Showing posts with label Halloween decor. Show all posts

Sunday, September 8, 2013

Halloween Works in Progress

Hey everyone! I wanted to share a few of my most recent creations with y'all before I forget, which I'm known to do since I strongly believe there's a direct correlation between art and insanity!

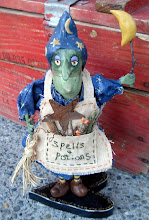
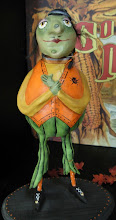
This is my first attempt designing/stitching and painting my version of a monster doll. I know, I know, you've probably seen a lot of these already, but I wanted to give it a try cause they're so darn cute. Mine isn't done yet so this really is a WIP (work in progress). Once I have him complete, I'll put up a new pic. I've got a couple more appendages to add...

Not using a pattern, I sort of winged it. Just stitching and shaping as I went along. Being a fabric hoarder (and darn proud of it!), I had lots of Halloween scraps and quarters available to choose from. It was more difficult than I thought to put all the fabric selections together, and even now it's too "perfect", so next time I'm just going to randomly pick and choose.

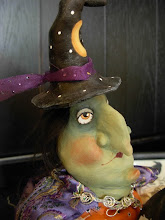
For the face, I did some stitching but then had to add in my handpainting as well. His "crazy" eye and teeth are painted and trimmed with stitching instead of ink.

Once I stitched all the parts and pieces together, I laughed out loud how he turned out! I liked him!

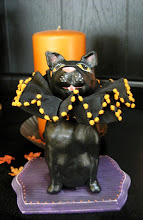
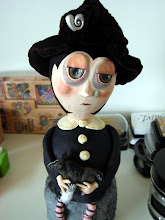
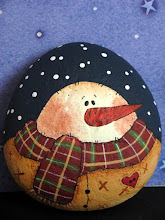
Here's my Halloween version of my favorite snowman holding a pumpkin under the night sky while a spooky tree watches from behind. I still have to add some finishing touches, but he's on the way to chubby cuteness!


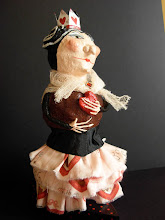
Next is a Halloween "Trick or Treat" Wish box. This is a petite wooden box, embellished with a special surprise inside; a tiny envelope to hide a wish underneath the lid. The top is painted with witch boots(say that 3 times fast!) and whirls, stars and dots, along with lots of witch hats all the way around the sides. It's held up by 4 ball feet, each painted a different Halloween color with added polka dots. Inside is lined with black and white polka dot paper.

 
You can see all of these and more in my Etsy store. Just click here and it will take you right to it. Happy Halloween! 

Monday, July 29, 2013

Dog Days......

In these heat-filled, semi-humid dog days of summer, my comfort is knowing that the days of Orange and Black are not far away...

Did you ever wonder where the origin of using these colors for Halloween started? Celtics were given the most credit for the beginnings of the holiday as a festival of the harvest. And orange, being the most prevalent color of autumn. The color of pumpkins, the warmth of fire. It also signifies strength and endurance, and used often in feng shui, being the "social" color, instilling lively conversations and good times in your home.
 
 
Black, the color of mystery and void. The color of a space with no beginning and no end. Black holds the power of energy and protection.
 
Do you see now why this is a perfect color combination for Halloween?


Thursday, September 22, 2011

Halloween Creepy Craft

Of course I love October! It's Halloween silly! There's just something magical about the month don't you think? A certain feel to the air......


So with just a couple weeks away, I thought I'd share with you some wonderfully spooky, and frightfully kooky Halloween ideas for decorating this season!


Treat bags courtesy Martha Stewart

Rubber stamping of course is one method for making some cute Halloween cards and decor, but have you ever tried potato stamping? It's an easy way to add a bit of spookiness to treat bags, gift tags or anything else you might want to creep out...

All you need are a few items:

Potato - I use Idaho since they're larger and firmer
Paring knife
Carrot or apple peeler
Small melon baller (for eye sockets) but you can use the end of one of the peelers as well
Acrylic paints (whatever colors)

Item you want to stamp (cards, bags, tags...)


Anywhere you cut away or scoop out, will be the part that doesn't make an imprint. So if you scoop out eyes for example, those will remain white or whatever the background of what your stamping on is. Get it?

Let's get started! After determining your pattern, cut the potato in half. Then I like to draw my pattern onto the raw potato (Sharpie pen or outline with the point of a skewer, whatever...). Next, start "carving" away the design. Remember - the raised portion will be what gets printed onto the card, tag, etc.... Once you've finished carving, brush your acrylic paint onto the potato and stamp away! Easy and fun!


Here are a few ideas of what to stamp to get you started:

Bats
Skulls
Pumpkins
Candy Corn

I used this technique (waaaay before Martha ever got hold of this idea!) on black satin drapes I made and then stamped them with white skulls and hung them in my windows for Halloween. Truth be told, I had them up all year actually because.... everyday is Halloween!!!