
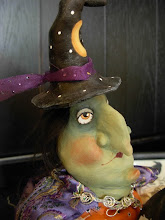
If you've been following me lately, you know that I've been busy getting ready for my 3 upcoming shows, making as many items as I can so my booth is well stocked. To me, if you don't have a full booth, it doesn't look good and I think buyers are less likely to come in to shop. We can talk booth set up later...
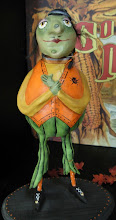
So with that, I want to talk about my sculptures that I create. Unlike many artists out there, I don't mind sharing. There's no "secrets" or hidden techniques on how I do things. There's really nothing new to working with clay or papier mache. All I can add are my own tips that help me.
First, if I want to cover something more quickly, I will use papier mache as my base. It's cheaper and goes on easier than paper clay. You can come back later after it dries and add paper clay details if you want.
When working with papier mache, OMG it's a mess, but a fun mess! I use Fastmache. It comes in a box and you mix it with warm water. Put whatever amount you want to start with into a Ziploc baggie so you can seal it and knead it. Start slow on adding the water. I like to end up with a kneadable dough almost like clay. You don't need to worry about getting all the lumps out, that's what gives it tooth and texture and keeps it from looking pretty-boy perfect. Also, I add a drop of Dawn dishwashing liquid. It's supposed to aid in any mold that might form, though I've never ever seen that happen even years later. Oh well, add it cause it doesn't hurt your mixture either way.
When applying your mixture over your armature, like a styro ball or foil, as you work, wet your fingers to keep the mix from sticking to your hands. I keep a bowl or a cup of water handy to keep dipping. Helps with smoothing also!
Before you start working in details or smoothing it out, let it dry for a bit. Just till it's slightly tacky then go in and smooth over with a wet finger. You can also use a wet paintbrush. I've found that works well also.


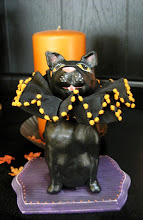
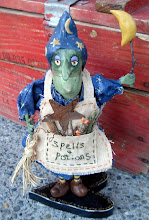
Here are a few more heads drying. I'm going to be making some pumpkin wands and also some "make-do's" which to me are just heads on top of something. I'm using painted candlesticks. These took a few days to dry cause of the damp weather.
Onto paper clay. I don't like just any brand of air dry clay, I prefer Creative Paperclay. It's just a better quality I find. You'll pay slightly more but I think it's worth it. I will admit though I do use the lesser known brands occasionally when I'm just doing something small, like an accessory to my larger sculpture. Ok, so let's talk about it.
Unlike papier mache, paper clay is smoother and more of a finished look. I tend to be more of a perfectionist when working with clay than with papier mache. I want it to look very smooth and get out any lumps, bumps or imperfections. I drive myself crazy trying. Or crazier rather!

Some artists apply a coat of Gesso to the piece after it's dried and before painting. I've done it both ways and don't find a lot of difference really. The acrylic paint still sticks and covers just as well.


Do I prefer paper clay over papier mache? No, not really. It just depends on what I'm making and the desired outcome I want.


No comments:
Post a Comment