Showing posts with label papier mache. Show all posts

Friday, August 19, 2016

Paperclay or Papier Mache? Well That Depends

If you've been following me lately, you know that I've been busy getting ready for my 3 upcoming shows, making as many items as I can so my booth is well stocked. To me, if you don't have a full booth, it doesn't look good and I think buyers are less likely to come in to shop. We can talk booth set up later...

So with that, I want to talk about my sculptures that I create. Unlike many artists out there, I don't mind sharing. There's no "secrets" or hidden techniques on how I do things. There's really nothing new to working with clay or papier mache. All I can add are my own tips that help me.

First, if I want to cover something more quickly, I will use papier mache as my base. It's cheaper and goes on easier than paper clay. You can come back later after it dries and add paper clay details if you want.

When working with papier mache, OMG it's a mess, but a fun mess! I use Fastmache. It comes in a box and you mix it with warm water. Put whatever amount you want to start with into a Ziploc baggie so you can seal it and knead it. Start slow on adding the water. I like to end up with a kneadable dough almost like clay. You don't need to worry about getting all the lumps out, that's what gives it tooth and texture and keeps it from looking pretty-boy perfect. Also, I add a drop of Dawn dishwashing liquid. It's supposed to aid in any mold that might form, though I've never ever seen that happen even years later. Oh well, add it cause it doesn't hurt your mixture either way.

When applying your mixture over your armature, like a styro ball or foil, as you work, wet your fingers to keep the mix from sticking to your hands. I keep a bowl or a cup of water handy to keep dipping. Helps with smoothing also!

Before you start working in details or smoothing it out, let it dry for a bit. Just till it's slightly tacky then go in and smooth over with a wet finger. You can also use a wet paintbrush. I've found that works well also. 
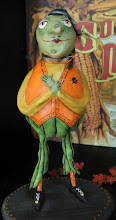
This is the head of my pumpkin man below. The papier mache is covering a Styrofoam ball with a dowel inserted to later put into his base. Because I live in a humid climate, it took a few days to dry. That's ok, other stuff to work on!

This is my finished piece. I'm very happy with him and think he's a real cutie! His expression just makes me smile!  Now, to paint him, you don't need to apply anything special to seal it. Acrylic paints seal. That's all I used, just cream color acrylic paint. Then after he was dry, I washed over a thinned brown paint and wiped off to give an antique look.


Here are a few more heads drying. I'm going to be making some pumpkin wands and also some "make-do's" which to me are just heads on top of something. I'm using painted candlesticks. These took a few days to dry cause of the damp weather.

Onto paper clay. I don't like just any brand of air dry clay, I prefer Creative Paperclay. It's just a better quality I find. You'll pay slightly more but I think it's worth it. I will admit though I do use the lesser known brands occasionally when I'm just doing something small, like an accessory to my larger sculpture. Ok, so let's talk about it.

Unlike papier mache, paper clay is smoother and more of a finished look. I tend to be more of a perfectionist when working with clay than with papier mache. I want it to look very smooth and get out any lumps, bumps or imperfections. I drive myself crazy trying. Or crazier rather!
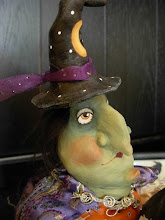
Here's my witch head out of paper clay. You can see the difference in the texture between the papier mache and clay. The technique is not much different really other than you can really push and pull the clay into areas and you don't get the same sticking issue. I still dampen my fingers to help with any stickiness and also to smooth or blend areas together. Don't use too much water though or you could get cracking when it dries. I use clay tools to help blend in added clay to the piece such as for a nose or cheeks. You can pick those up very inexpensively at local craft stores. The cheapo plastic ones work just as good as the metal I found.

Some artists apply a coat of Gesso to the piece after it's dried and before painting. I've done it both ways and don't find a lot of difference really. The acrylic paint still sticks and covers just as well.
So for the witch, I applied my acrylics, let them dry and then went back over with a couple washes of various shades of green and then a brown for some antiquing. Finally I sealed with a satin waterbase varnish. You could leave unsealed as well because as I said, acrylic paints do act as sealers as well.


This head, out of papier mache, is going to be something I've not created before really. It doesn't look like much now, maybe you can make out the nose and cheeks. This will be a sweet doll. Hopefully. Her face will be sanded smoother, still keeping some of the "tooth", and then painted in soft, natural colors, much like dolls were in the old days. Not sure yet of the hair or the rest. She'll be a work in progress. I'll post pics as I'm going along.

Do I prefer paper clay over papier mache? No, not really. It just depends on what I'm making and the desired outcome I want.

Monday, May 24, 2010

Gruela VonGrimKiss is Quite Perturbed!


Poor Gruela (pro-nounced "Groo-la"). Stiffed. Jilted. Dumped. And now she's perturbed! More than perturbed really. She's downright irate, furious, livid!

The same old story I'm afraid; all dressed up and nowhere to go. After being left at the alter, Gruela and Max, her fierce familiar, are putting their heads together for a sweet settling of scores. Surely there must be a spell to remedy this most dire of happenstances? Is Gruela destined to remain an old Bag for eternity? We sincerely hope not!

Her gown, sculpted of papier mache, features an over-dress of black (albeit a bit of grave mold), and a blouse and petticoat of cotton-candy pink with a sheer overlay of Queen Anne's lace. In her spindly fingers, she clutches her lover's heart to her chest..... Her hat is also of papier mache and is adorned with a trim of holographic silver lace. Her hair is gray and black pulled wool, and she wears a veil of tattered, tea dyed cloth.

Sculpted of paperclay, her face is beautified with the latest shades of Modern Witch make-up.

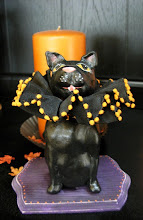
Never leaving her side, Max is sculpted of papier mache and wears of bow of black polka dot cotton around his neck.

This piece stands a very tall 16" and is mounted on a wooden base, signed and numbered by me.

Another lovely addition to the VonGrimKiss clan! On Etsy tonite!

Sunday, May 23, 2010

Another Peek...


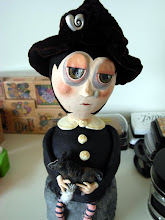
Meet Gruela (pronounced "Groo-la"). She's quite perturbed after being jilted and left at the alter. Her cat is none too pleased either. I wouldn't mess with him.

She's not quite done but I promised a view on Sunday, and Sunday it is! I've got some details to add to both her and her oh-so-friendly familiar. More pics, and better pics, to come.....

Saturday, May 8, 2010

WIP - Witch in Progress!

After a bit of a break, I've started work again on some new pieces. Here's the first of many more lovely witches to come!


So far nameless, this is my heartbroken witch bride. Left standing at the alter waiting for her beloved, she died clutching her heart. Very sad indeed......


Sculpted of paperclay and papier mache, she stands 15" tall. She's not quite done - have a few more things to add.


Come back and visit her won't you?

Sunday, February 14, 2010

My Queen of Mean - Valentine Hag


It's a bit late to post my contribution to the Valentine swap, but my camera went dead and had to charge the batteries. Sorry for the delay.

Here she is: the Queen of Mean - Valentine Hag. Actually, she doesn't look all that mean to me. She's sort of got an Angelica Houston meets Lily Munster look. LOL!

I totally enjoyed making her. It was a challenge being my first complete papier mache sculpture. I know I can do better as far as the smoothness of the surface texture, but then again, it's sort of interesting to have that much tooth. It was very messy and sticky to work with, but it was easier to get the nice long fingers out of PM then it is clay, and once dry, the surface was easier to paint than clay as well.

I think I'll give it another go with papier mache and try some more pieces. Oh, and the swap was really fun and I will do more of those in the future too.

Tuesday, January 26, 2010

Queen of Mean - Valentine Hag

I have to say that it's amazing to see a piece without paint and all it's glam and glitter. It goes from nothing to something with just a few dabs of paint. This is certainly the case here - my goodness!
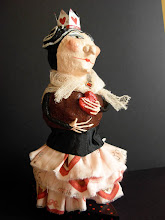
This is my first real piece out of papier mache. I had to enlist the aid of veteran experts Laurie Hardin of Monkey-Cats Studio and David Everett of Chicken Lips for mixing and sculpting tips. Oh what a mess I made. It's way harder than it looks. It's gooky and sticky and dusty and just plain icky! So kudos to the talented duo! I will say this though, after I got going, it was rather fun in a challenging sort of way so maybe they'll be more to come. We'll see if I can master it.

So please meet the "Queen of Mean - a Valentine Hag". This lovely lady is for a Valentine swap with Rabbit Hallow Prims. Once she's painted and dressed in her finery, you can be sure I'll take an "after" picture to post. I can't wait to see her myself!

Wednesday, July 22, 2009

Haunted House - The Unveiling


I know, I know - I promised Mordred, but she's still getting her gown altered. You know these high maintenance diva's. Never satisfied!

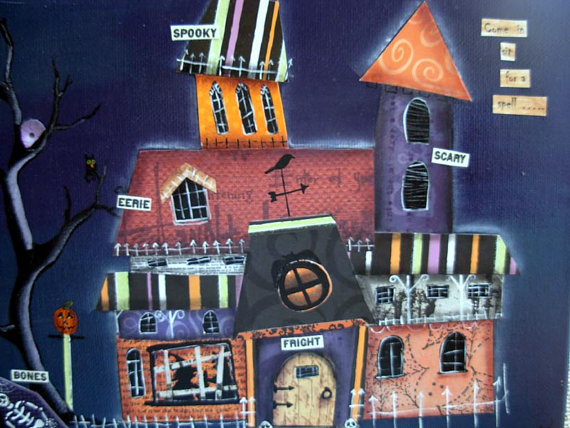
I'm hoping you will enjoy my haunted house in the interim. The top as you can see, has the haunted house with it's creepy front walkway and pumpkins standing watch. Each side (there are 10 sides to this box) has a semi-different silhouette. I say semi, because I used one or two of the designs twice as I loved them so much. For a whimsical touch, I added white, yellow, and orange polka dots. The inside is a decoupaged ensemble of assorted Halloween designed papers surrounding a non-too-happy skeleton attempting to make his escape. It is glazed inside and out with a waterbase varnish.

This little gem measures just shy of 12" across and 5" tall. Perfect for your other-worldly treasures! Finally listed for sale at http://www.bywayofsalem.etsy.com

Monday, July 6, 2009

Haunted House - Revamped


And top o' the evenin' to you! Wanted to show you all my re-do. I wasn't quite happy with the colors on my haunted house I showed you in a previous post, something just wasn't right but I couldn't quite tell what. It was calling "repaint me, repaint me." So with a few splashes, dots, and dashes of orange and some ink work, I think it's a bit more lively. Now to go to work on the lower half.... P.S. This is a really neat star shaped papier mache box that's about 10" across that will hold all other-worldly treasures.

Tuesday, June 16, 2009

Jeannine's WIP - Papier Mache Star Box

This is a really fun piece for me cause the shape is already done. No worries of smoothing the lumps and bumps, or shaping of clay, I just get to paint. And I love to just paint. Don't get me wrong - I adore creating my funny little characters, but it's the paint that brings them to life. Hmmm...kind of like me without make-up.

I've got a lot of work left yet, but at least I have the clouds, moon, and the all-important polka dot trim on. I'm thinking in the middle, a haunted house or graveyard, or, D.) all of the above. The box is rather large, so it should be an impressive piece with room for lots of spookiness. Not sure yet how I'll line it - I'll conjure up something appropriate...maybe decoupage or a crushed velvet.